
What you will need
- My Book Showroom active (see Guide 01: Quick Start → if not done)
- A spreadsheet of your catalog data in CSV or XLSX format
- Column headers that match the MBS template (or the downloadable template itself)
The CSV importer works on the FREE tier with no license key required. If you want to export your settings alongside the import, that feature requires a registered free key — see Guide 09: Register Your Free License Key →.
Step 1 — Download the CSV template
Go to My Book Showroom → Settings and click the Import / Export tab. In the scenario cards, click Import Books.
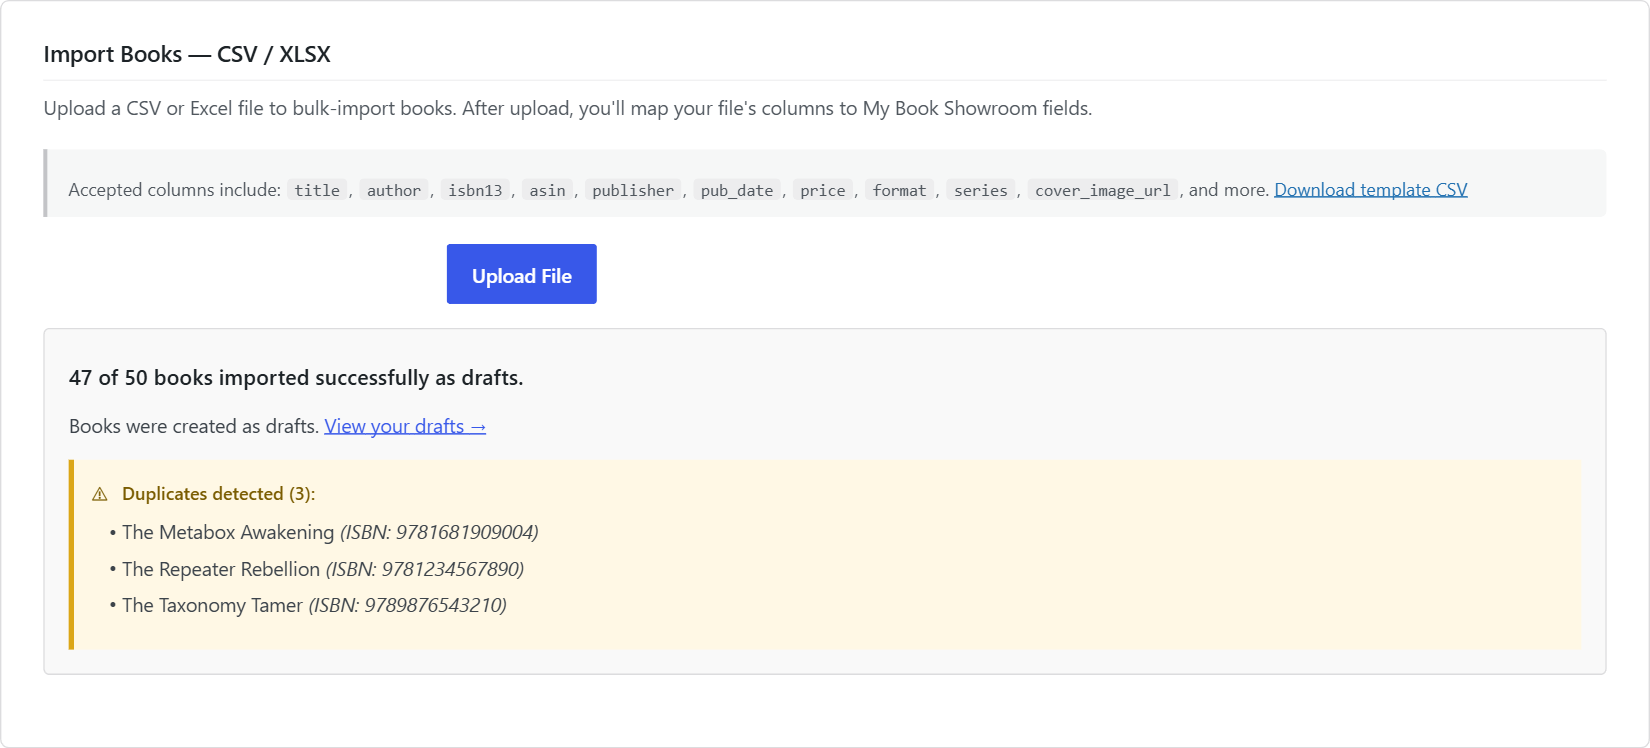
The panel expands below to show the file upload controls and a Download template CSV link.
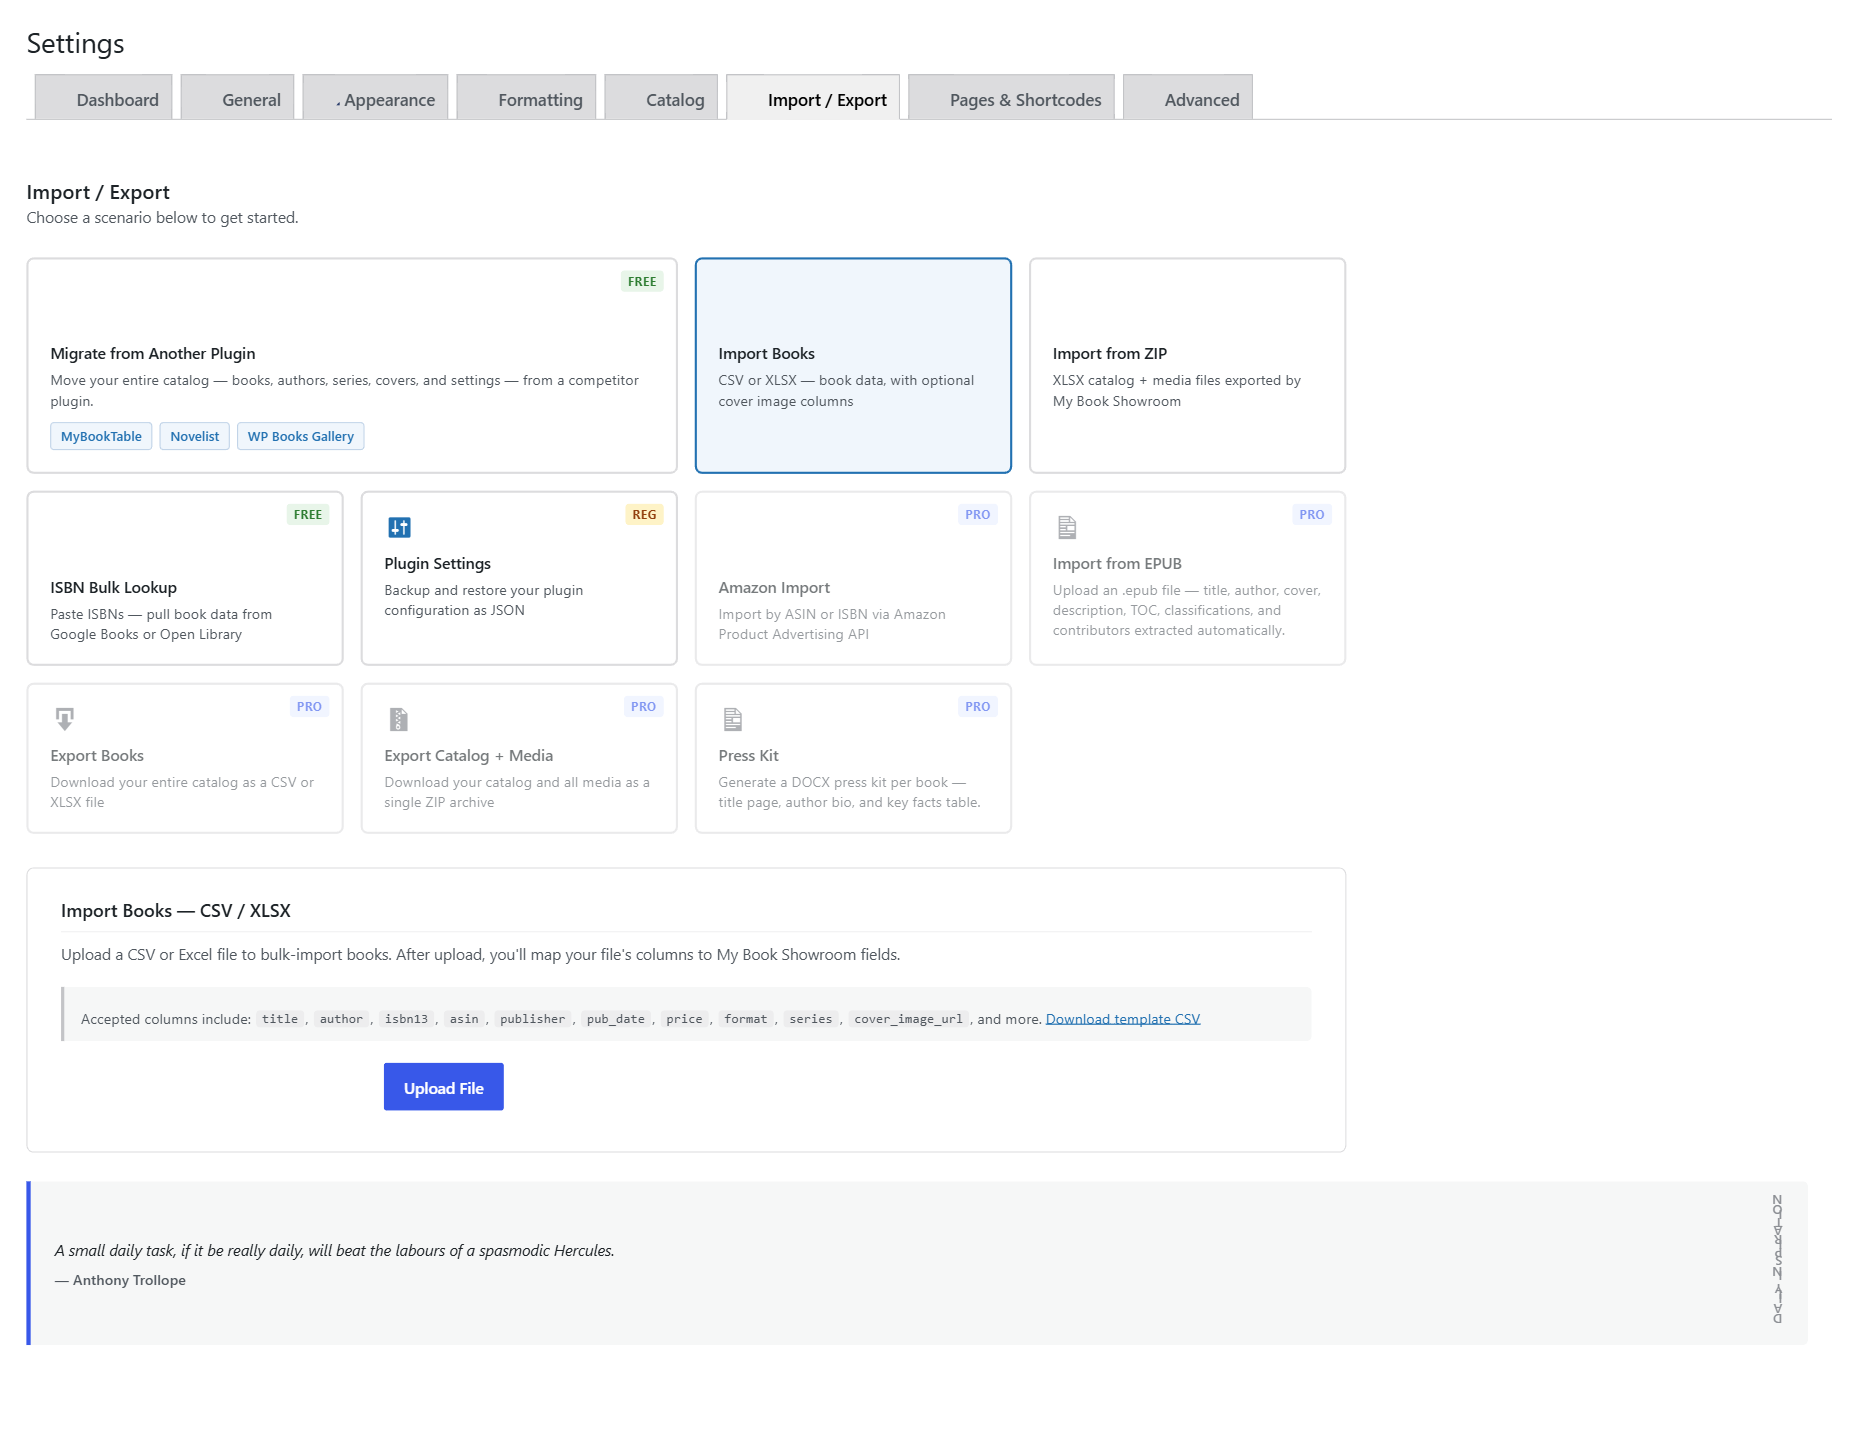
Click Download template CSV. Your browser downloads a ready-made template file. Open it in Excel, Google Sheets, LibreOffice, or any spreadsheet application.
Always start from the downloaded template rather than building your own CSV from scratch. The template has the exact column names MBS expects, a header row in the correct order, and a sample data row to illustrate the format.
Step 2 — Fill in your catalog data
Open the template and complete one row per book. The columns are:
- Title — required; every other column is optional
- Author — primary author display name
- ISBN — ISBN-13 preferred; ISBN-10 is accepted and normalized automatically
- Description — full back-cover blurb or synopsis
- Tagline — one-sentence marketing hook (150 characters or fewer)
- Series — the series name exactly as you want it to appear
- Series Position — a number (1, 2, 3 …) for reading order within the series
- Genre — the primary genre label (e.g.
Fantasy,Romance,Thriller) - Tags — comma-separated keywords
- Format — the edition type (e.g.
eBook,Paperback,Audiobook) - Price — retail price as a plain number, e.g.
9.99 - Buy Link — the full purchase URL including
https:// - Published Date — publication date in
YYYY-MM-DDformat - Publisher — publisher name
- Page Count — a whole number
- Language — two-letter ISO 639-1 code, e.g.
en,fr,de
Leave any cell blank if you do not have the data. MBS will create the book record with whatever fields are populated and leave the rest empty for you to fill in later.
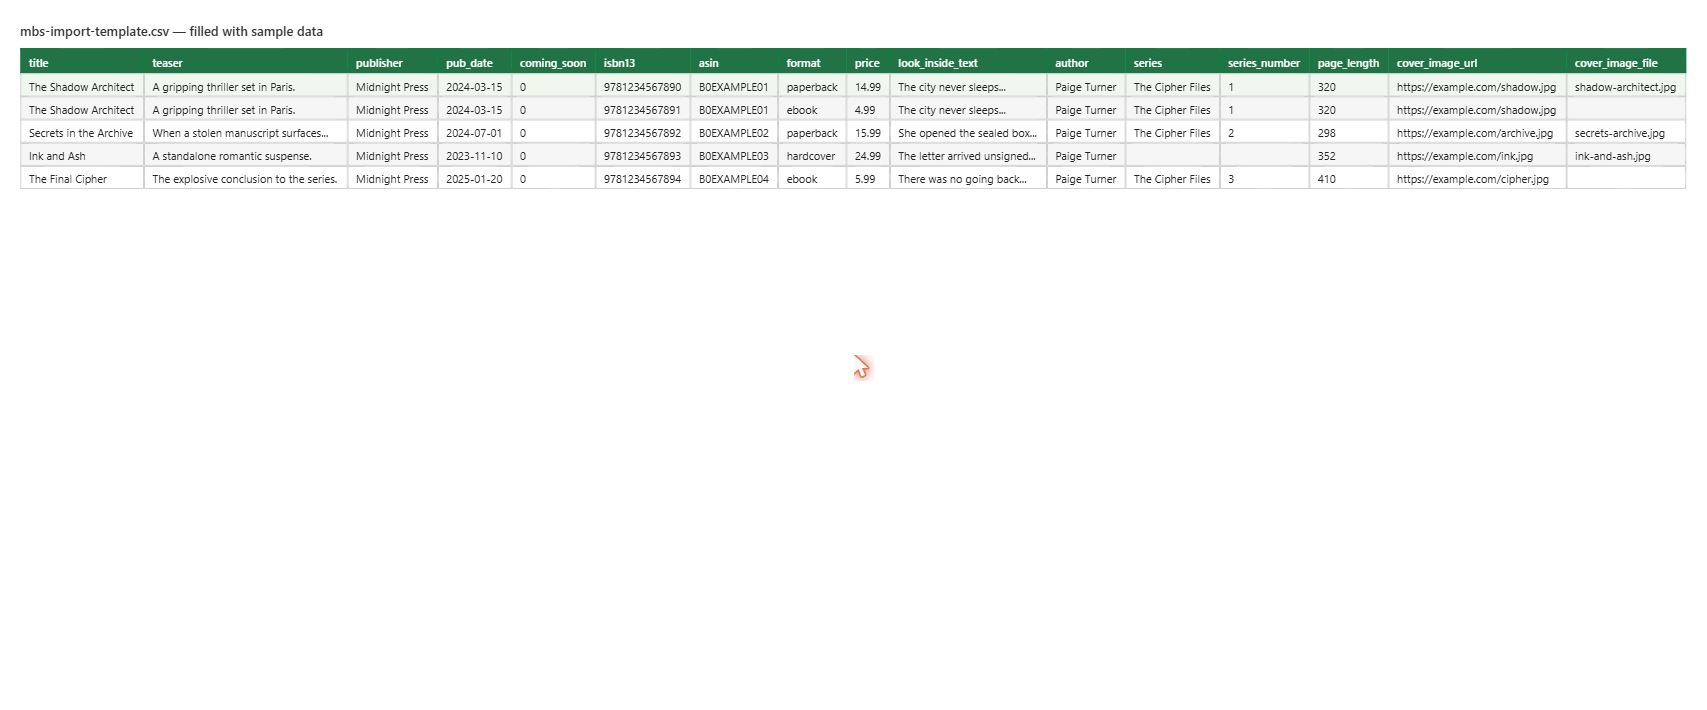
Cover images are not imported via CSV. The importer creates the book record and metadata only. Add cover images after import by opening each book in the editor and setting the Featured Image in the right sidebar.
Step 3 — Save your file
Save the completed spreadsheet. You can save as CSV (.csv) or Excel Workbook (.xlsx) — MBS accepts both formats using the same column layout.
Keep the file under WordPress's configured upload limit (2 MB by default). For a large catalog, split the spreadsheet into multiple files of 200–300 rows each and import them one at a time.
Step 4 — Upload your file
Back in the Import / Export tab with Import Books selected, click Choose File and select your saved CSV or XLSX file.
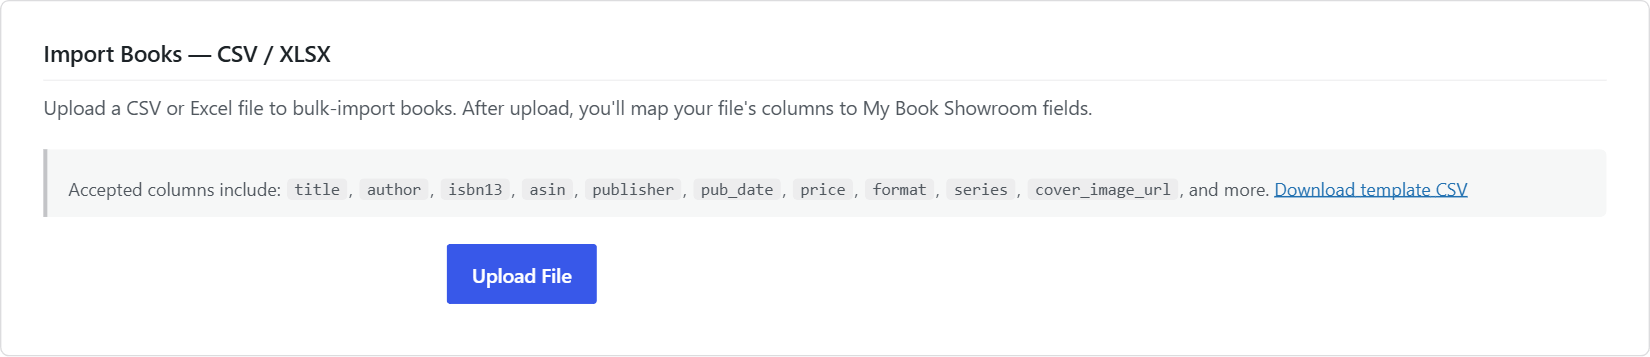
Click Upload File. MBS reads the file header row and displays a column-mapping table.
Step 5 — Map your columns to MBS fields
MBS shows a two-column table: your CSV column names on the left and a dropdown on the right for each one. Columns whose names exactly match an MBS field are pre-selected automatically.
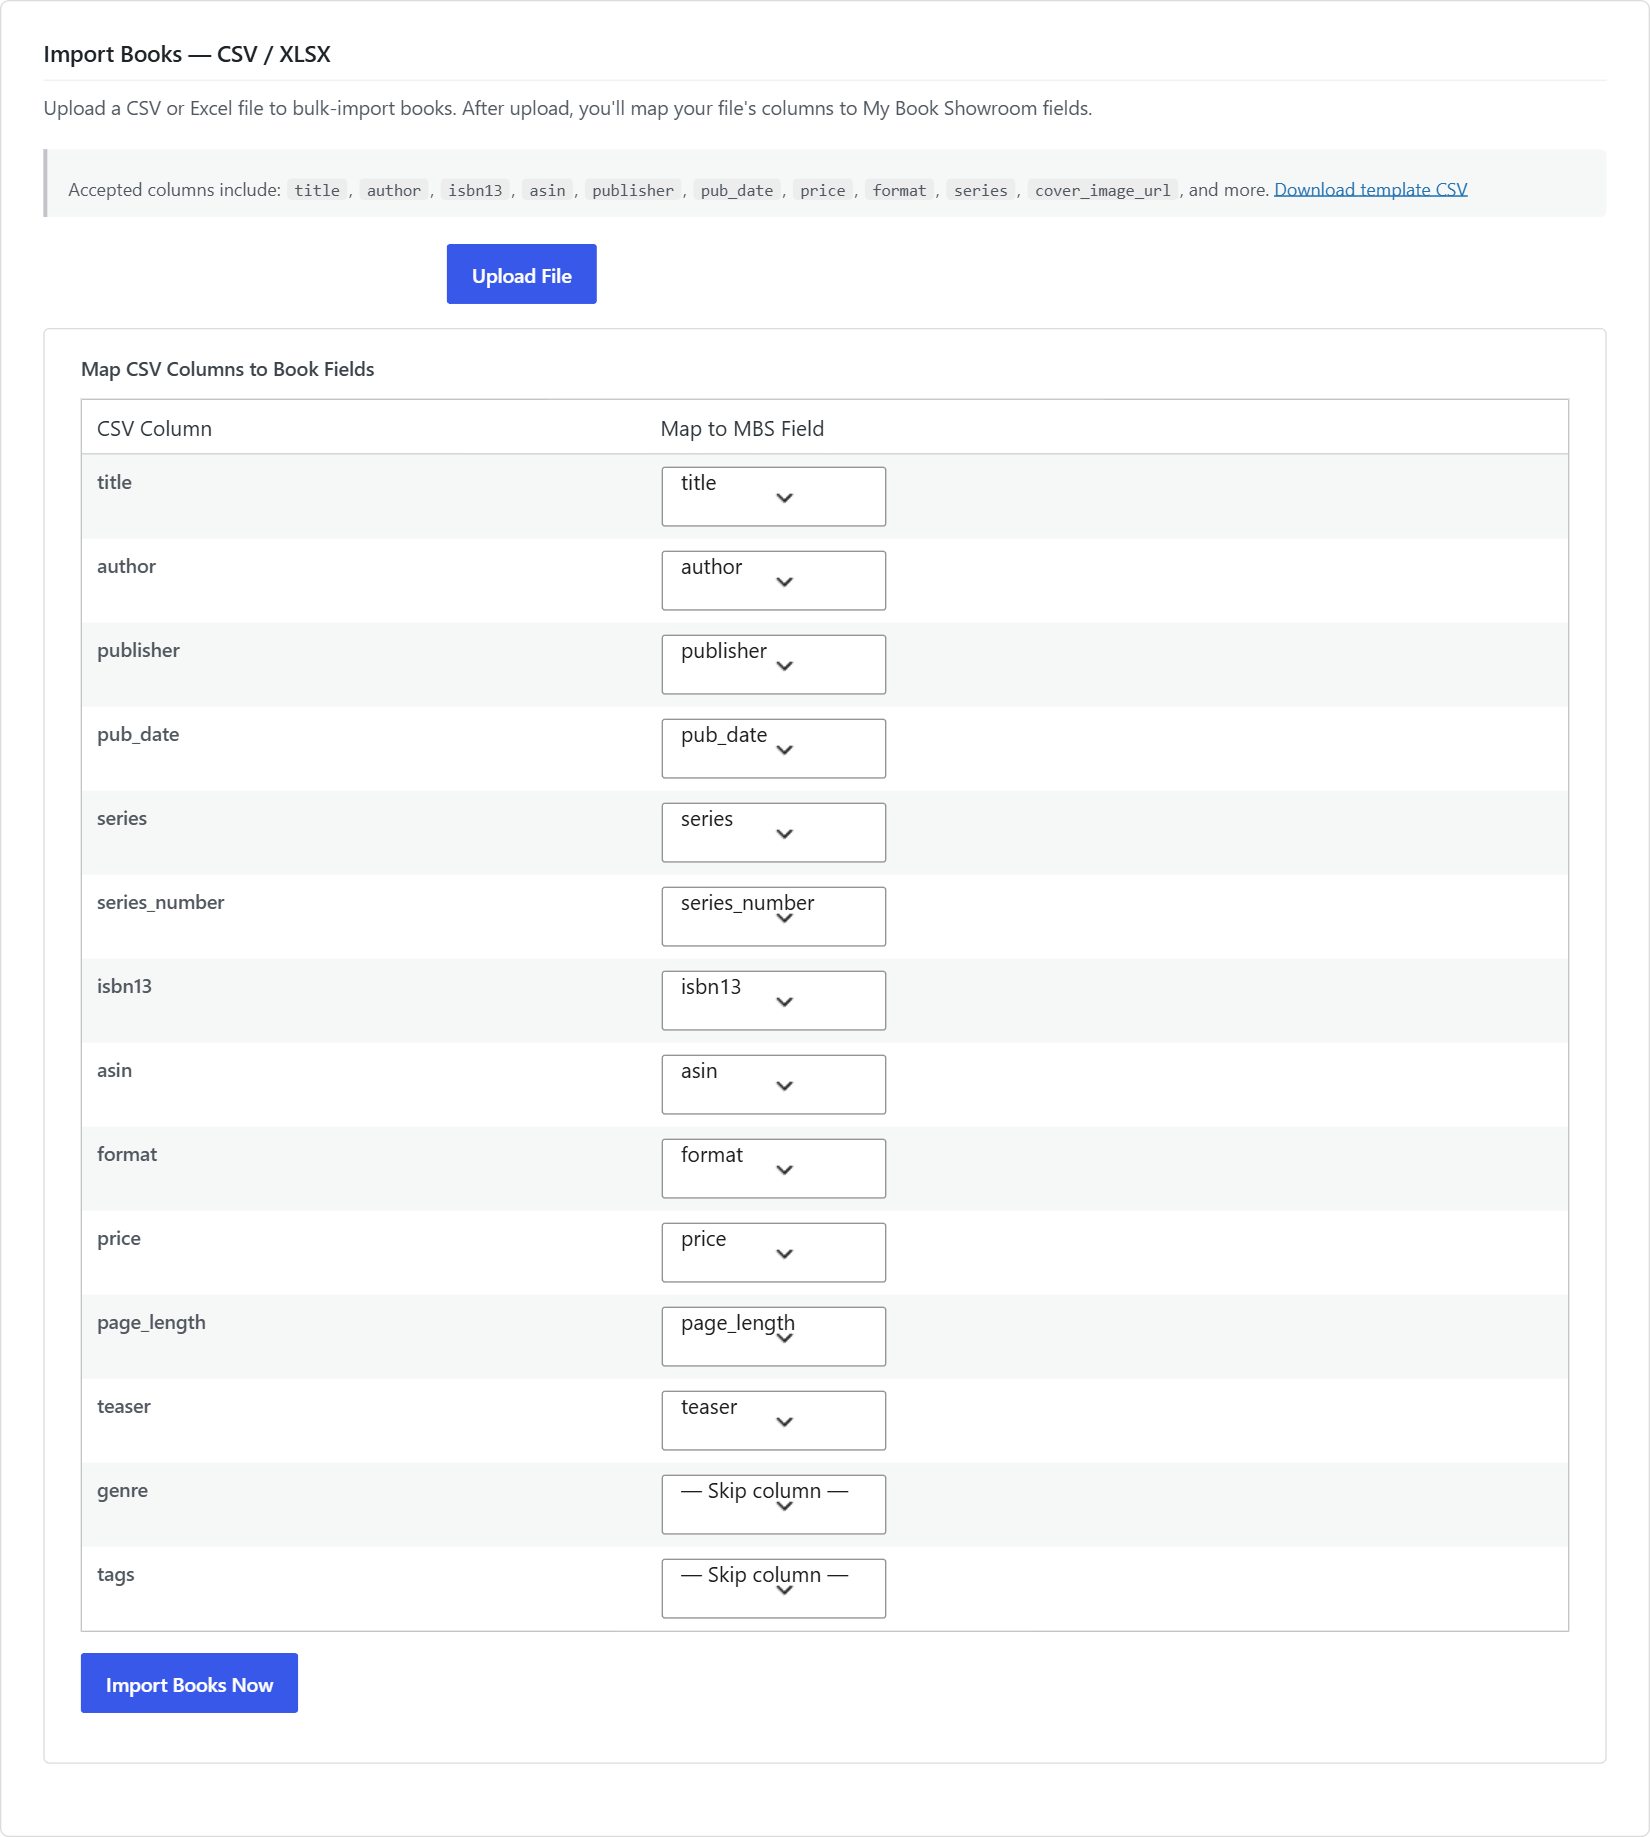
For each row:
- If the dropdown already shows the correct MBS field, leave it as-is
- If it shows — Skip column —, choose the matching MBS field from
the dropdown, or leave it skipped if you do not want that data imported
- Columns you cannot map to any MBS field can be safely skipped
Step 6 — Import your books
Click Import Books Now. MBS processes every mapped row and creates a WordPress Draft post for each book. A summary message appears showing how many books were created, how many were skipped as duplicates, and whether any rows produced errors.
Step 7 — Publish your books
Imported books are created as Draft posts. They do not appear in your public showroom until you publish them.
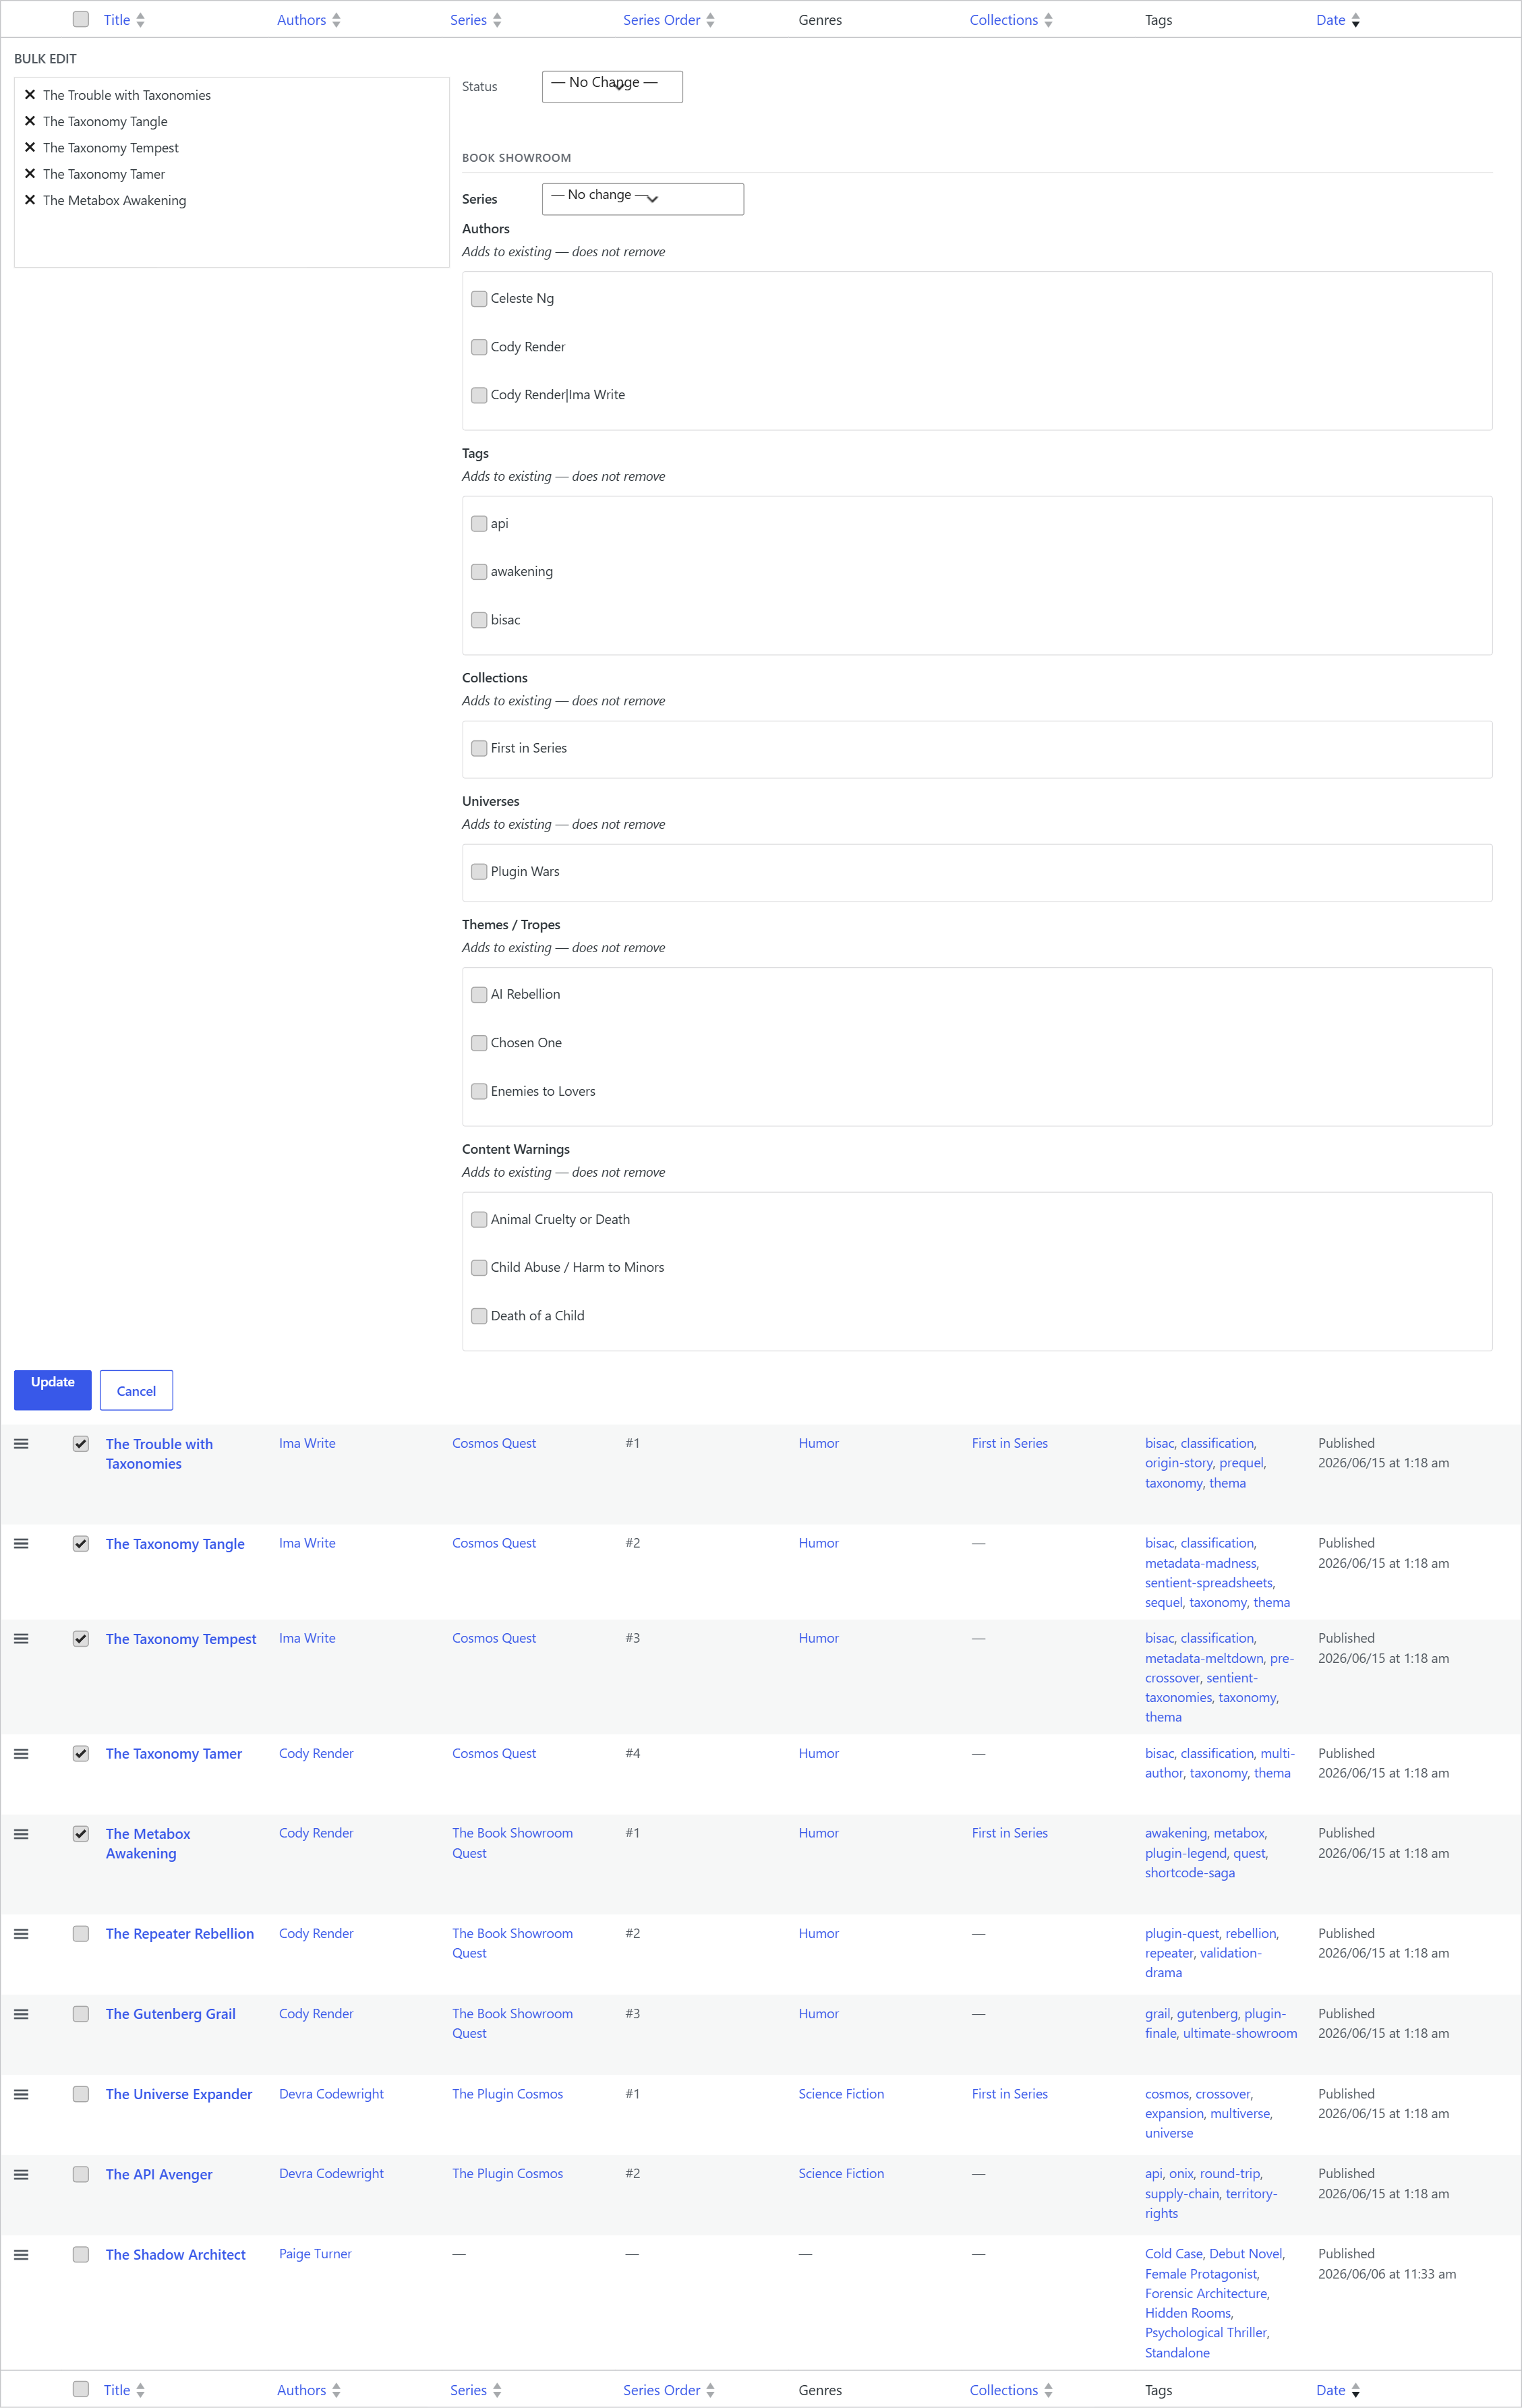
To publish in bulk:
- Go to My Book Showroom → All Books
- Check all the draft books you want to publish
- Open the Bulk Actions dropdown and choose Edit
- Set Status to Published and click Update
For individual books that need more attention before going live — missing covers, missing buy links, or series positions to set — open each one in the editor, complete the fields, then click Publish.
The fastest workflow for a large catalog: import everything first, bulk-publish all books, then go back and add covers and buy links individually. Your showroom will immediately show the titles, authors, and descriptions from the import while you fill in the missing details.