
What you will need
- At least one book in My Book Showroom (post type
mbs_book) - Author names and any secondary contributor names ready to enter
- A Publisher license if you want the Statement field on contributor rows; all
other features in this guide work on FREE and PRO
Two author-related systems in MBS
MBS separates main authors from secondary contributors using two distinct mechanisms. Understanding the difference prevents duplicate entries in your ONIX output and keeps the front-end author archive working correctly.
| | Author taxonomy | Contributors metabox | |---|---|---| | What it handles | Primary author(s) credited on the book | Illustrators, translators, editors, narrators, and other roles | | Tier | All tiers | All tiers (Statement field: Publisher only) | | ONIX role | A01 Author — auto-assigned | Your choice from ONIX List 17 | | Archive page | Yes — at /mbs_author/author-slug/ | No |
Step 1 — Add the primary author using the Author taxonomy
Open a book in the editor. In the Book Header metabox, find the Author(s) field. Begin typing the author's name — a typeahead list of existing author terms appears. Select a match or finish typing to create a new term.
To add a second main author (co-authored book), type a comma or press the plus button after the first author and begin typing the second name. Add as many main authors as the book has.
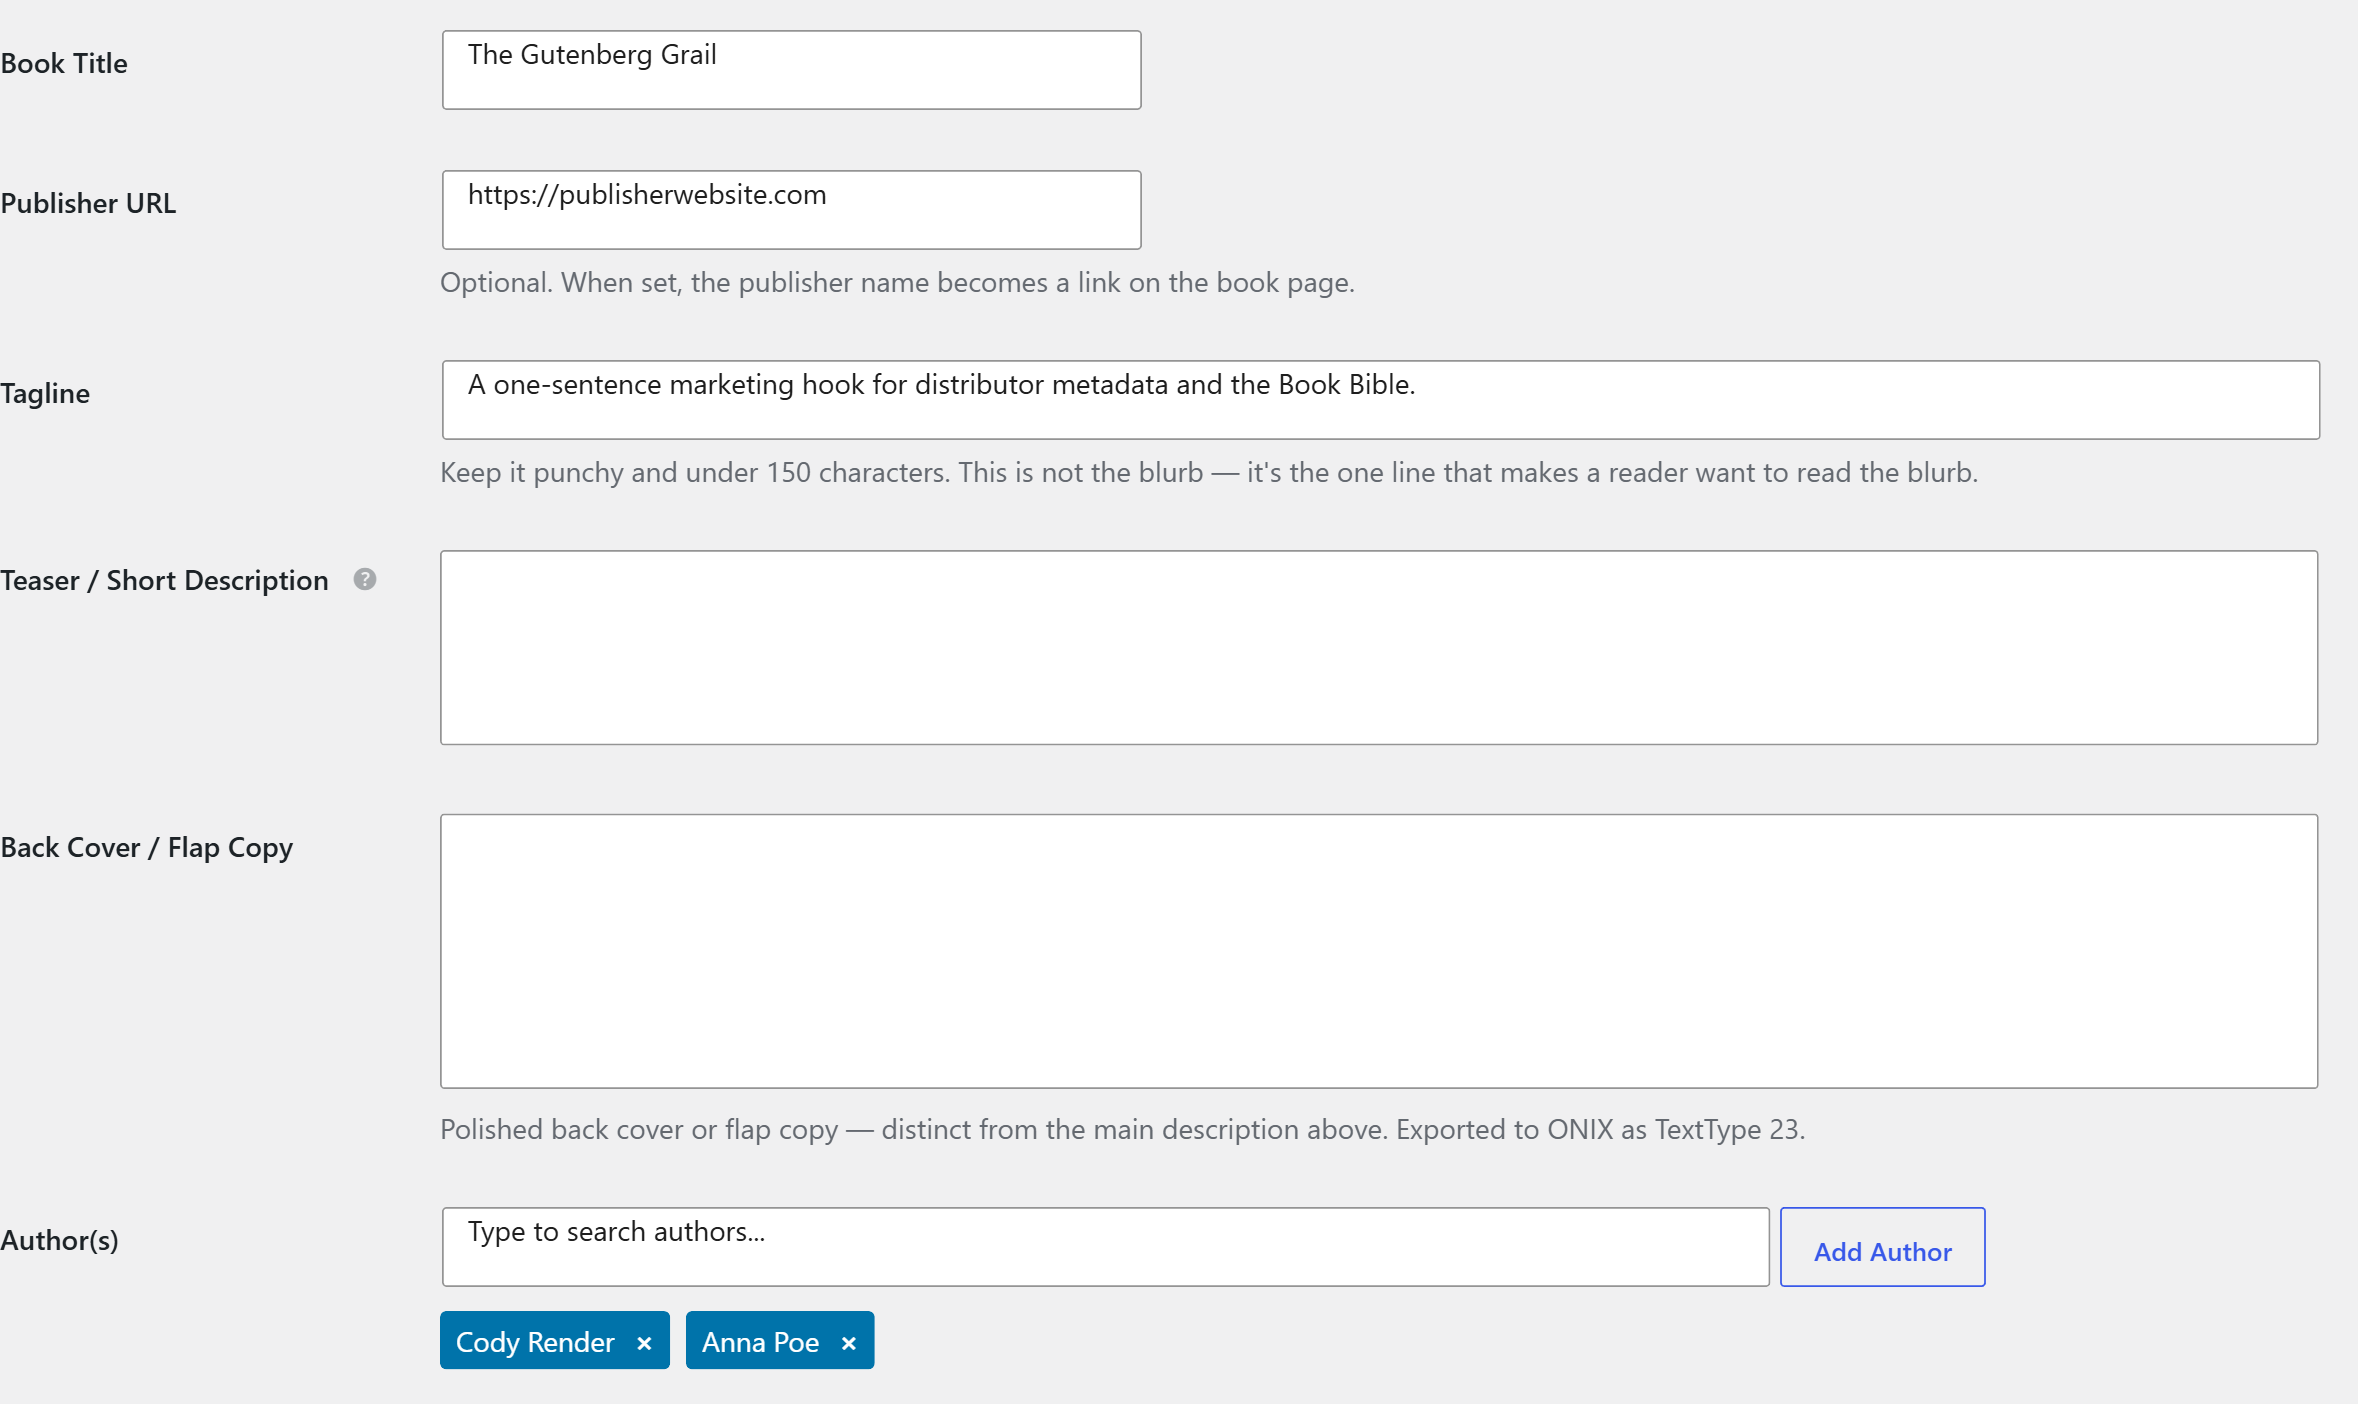
Every name added in the Author(s) field is exported to ONIX with the A01 Author role automatically. Do not also add those names in the Contributors metabox with the A01 role — that would create duplicate author entries in your ONIX file.
Step 2 — Add secondary contributors in the Contributors metabox
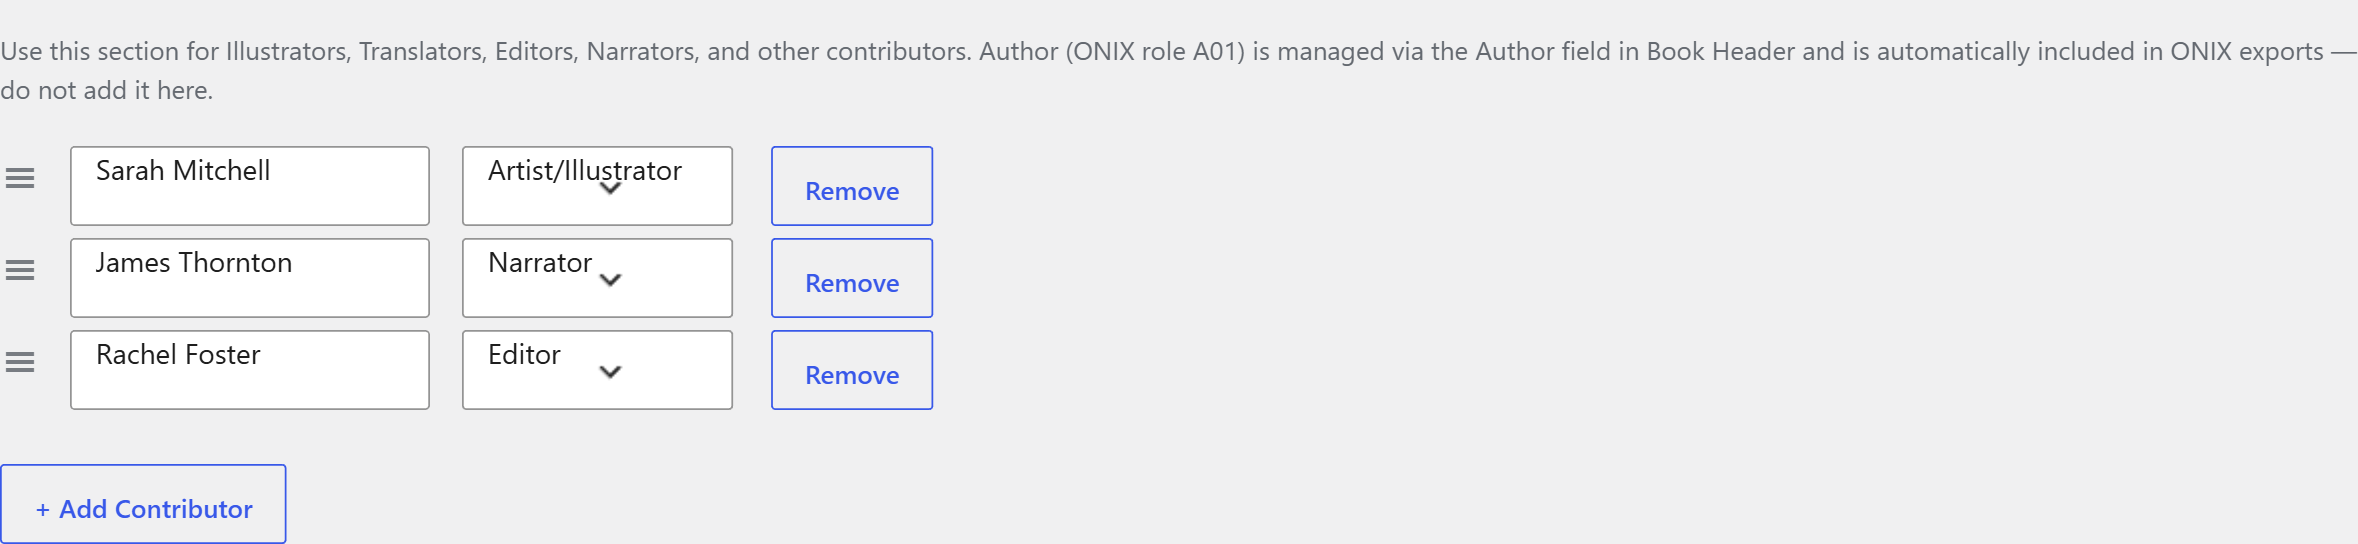
Scroll down the book editor to the Contributors metabox. It is separate from the Book Header metabox.
Click + Add Contributor to add a row. Each row has three fields:
- Contributor Name — typeahead from existing contributor terms; type to
create a new one
- Role — a dropdown of ONIX List 17 roles. Common choices include:
A12 Illustrator, A24 Editor, A09 Narrator, B06 Translator
- Statement — a biographical or role description for this contributor
on this book (Publisher license only)
Repeat + Add Contributor for each secondary contributor, then click Update to save.
Step 3 — Build out an author profile page
Each author term gets an automatic archive page at /mbs_author/author-slug/ that lists all books by that author. You can add a bio and photo to make it a true profile page.
- Go to My Book Showroom → Authors in the WordPress left sidebar
- Click the author's name to edit the term
- Fill in the Bio textarea with the author's biography
- Upload a Profile Photo using the photo field (uses WordPress term meta)
- Click Update

The archive page at /mbs_author/author-slug/ will display the photo and bio above the book grid.
Step 4 — Display an author directory on any page
To show a grid of all your authors with name, photo, and book count, add the [mbs_author_directory] shortcode to any page or post:
[mbs_author_directory]The shortcode renders a responsive grid of author cards. Each card links to that author's archive page. Only authors with at least one published book appear in the directory; authors with no published books are not shown.

Step 5 — Display a series directory on any page
To show a grid of all your series with their cover image and book count, use:
[mbs_series_directory]Place this shortcode on a dedicated "Series" page to give readers a quick overview of your full catalog organized by series.