
Book Club Resources is a PRO section you can add to any book. It lets you publish a discussion guide, a list of discussion questions, and downloadable files — all rendered in a tidy block on the front-end book page. It is perfect for authors whose titles get picked up by reading groups, libraries, and classrooms.
Everything is controlled from a single Book Club Resources panel in the book editor, and a visibility toggle lets you stage content privately before you reveal it to readers.
What you will need
- A PRO or Publisher license, activated in My Book Showroom
- A published book to attach the resources to
- Optional: a PDF or other file to offer as a download
Step 1 — Open the Book Club Resources panel
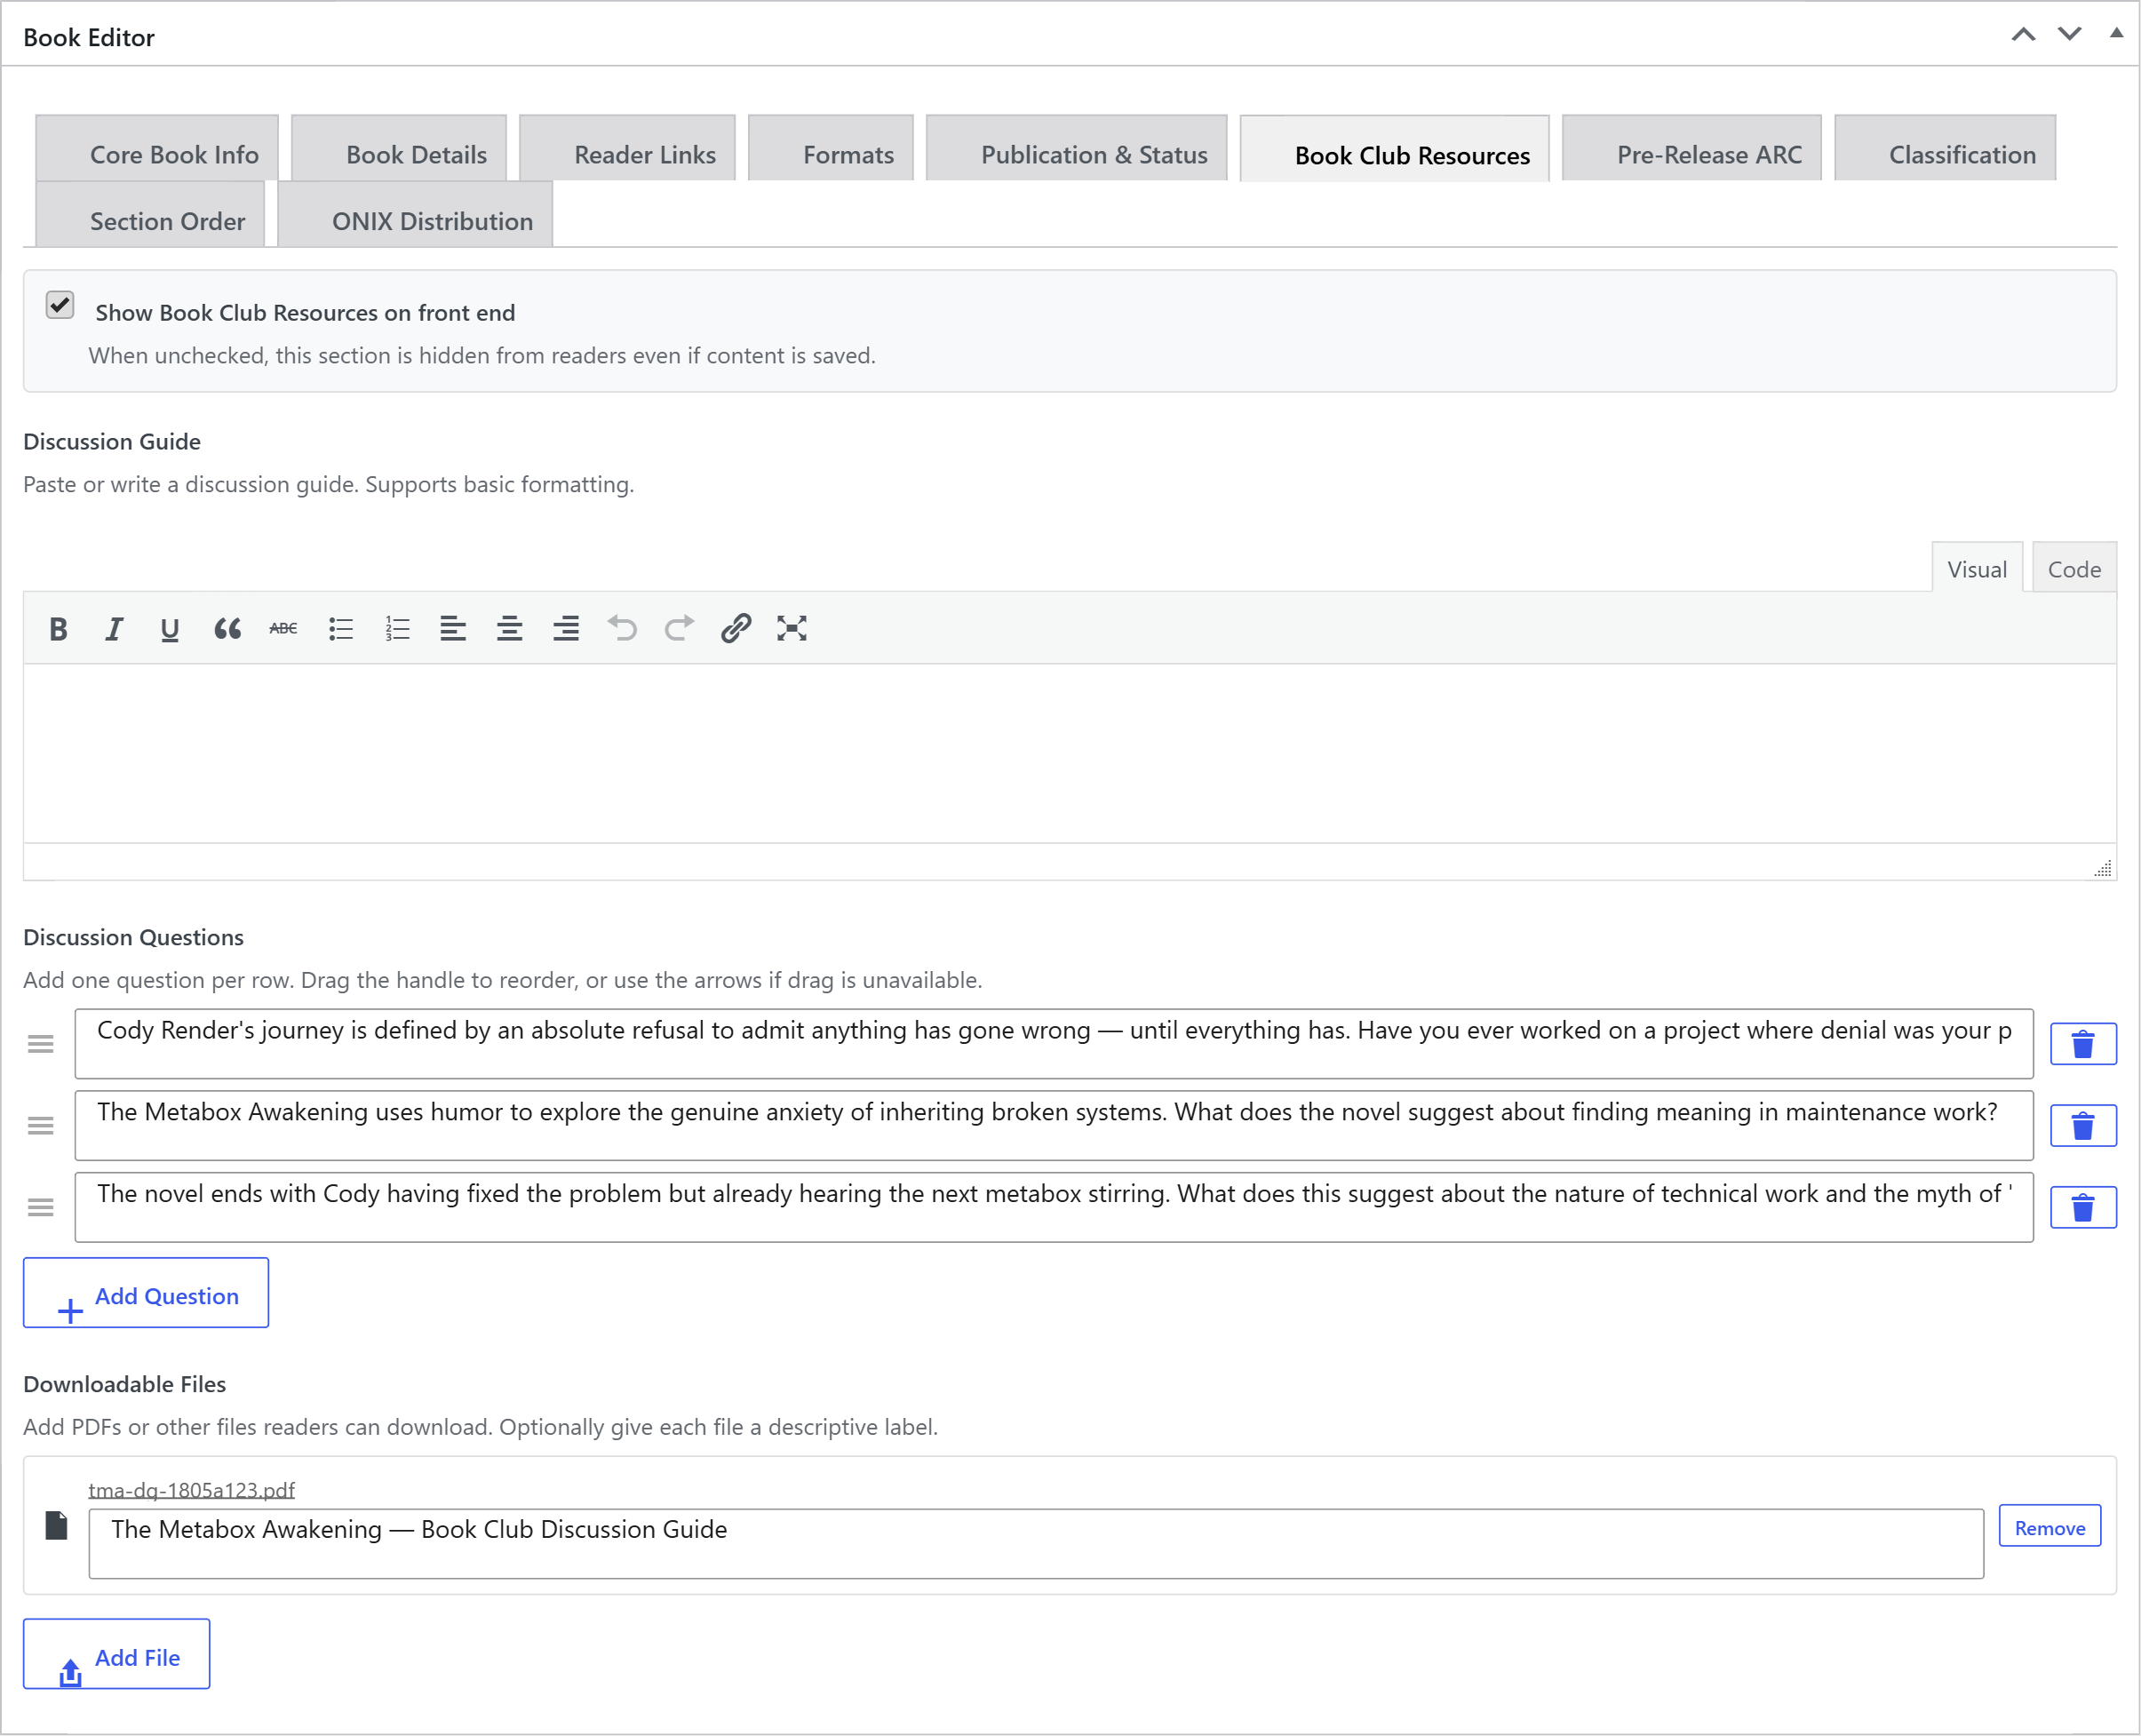
Edit the book you want to add resources to. In the book editor, open the Book Club Resources section.
This section appears only with an active PRO license. On the free tier the panel is hidden entirely — there is no visible placeholder.
Step 2 — Turn on front-end display
At the top of the panel is the checkbox Show Book Club Resources on front end. Tick it when you are ready for readers to see the section.
When this box is unchecked, the section is hidden from readers even if you have saved a guide, questions, or files. This lets you draft everything first and reveal it in one move later.
The section also stays hidden automatically if all three fields are empty — so an enabled-but-blank book never shows an empty Book Club heading.
Step 3 — Write the discussion guide
Under Discussion Guide, paste or write your guide in the rich-text editor. It supports basic formatting — bold, italics, links, and lists — so you can structure it into themes, background notes, or a welcome message for the group.
The guide renders under its own Discussion Guide heading on the book page.
Step 4 — Add discussion questions
Under Discussion Questions, click Add Question to create a row, then type one question per row. Add as many as you like.
To reorder questions, drag the handle on the left of a row. If dragging is not available, use the up and down arrow buttons on each row instead. The trash icon removes a row.
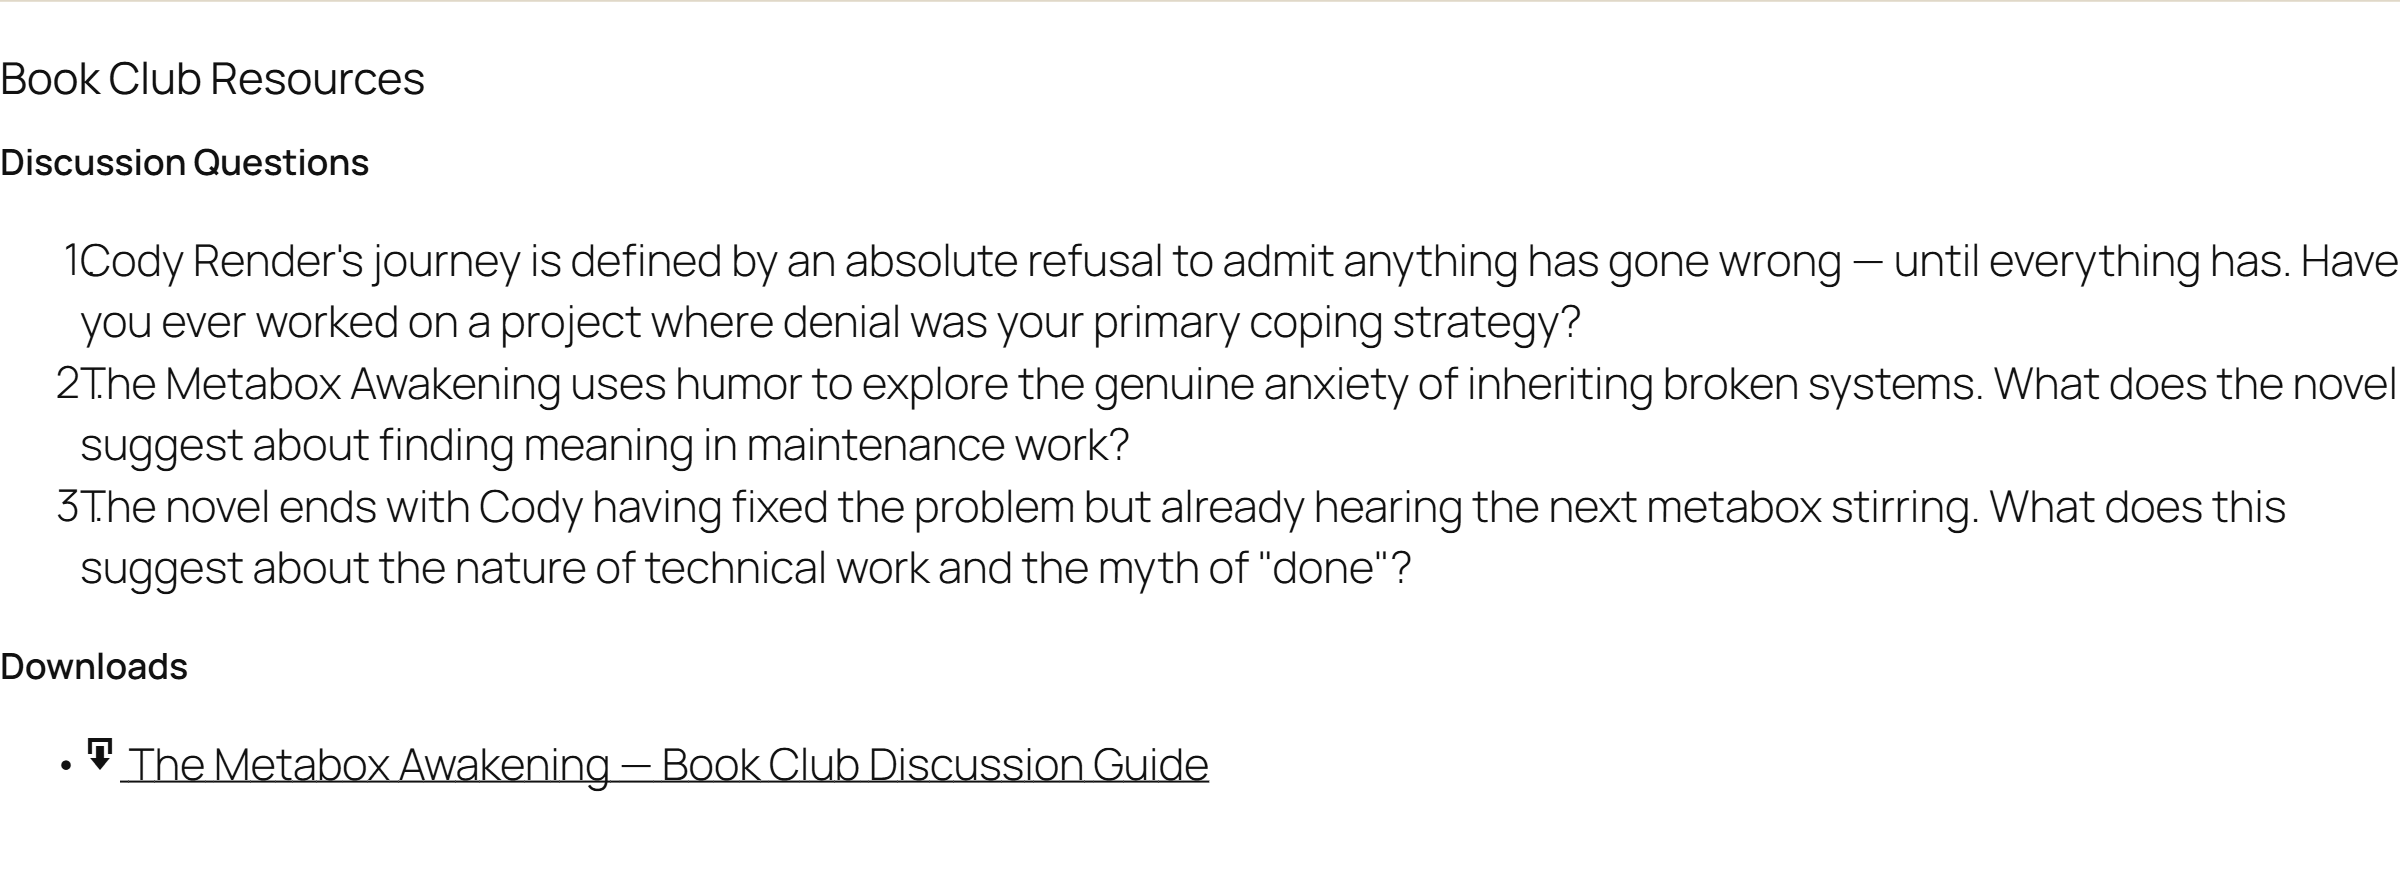
On the front end, the questions render as a clean numbered list under a Discussion Questions heading, in the order you arranged them.
Step 5 — Attach downloadable files
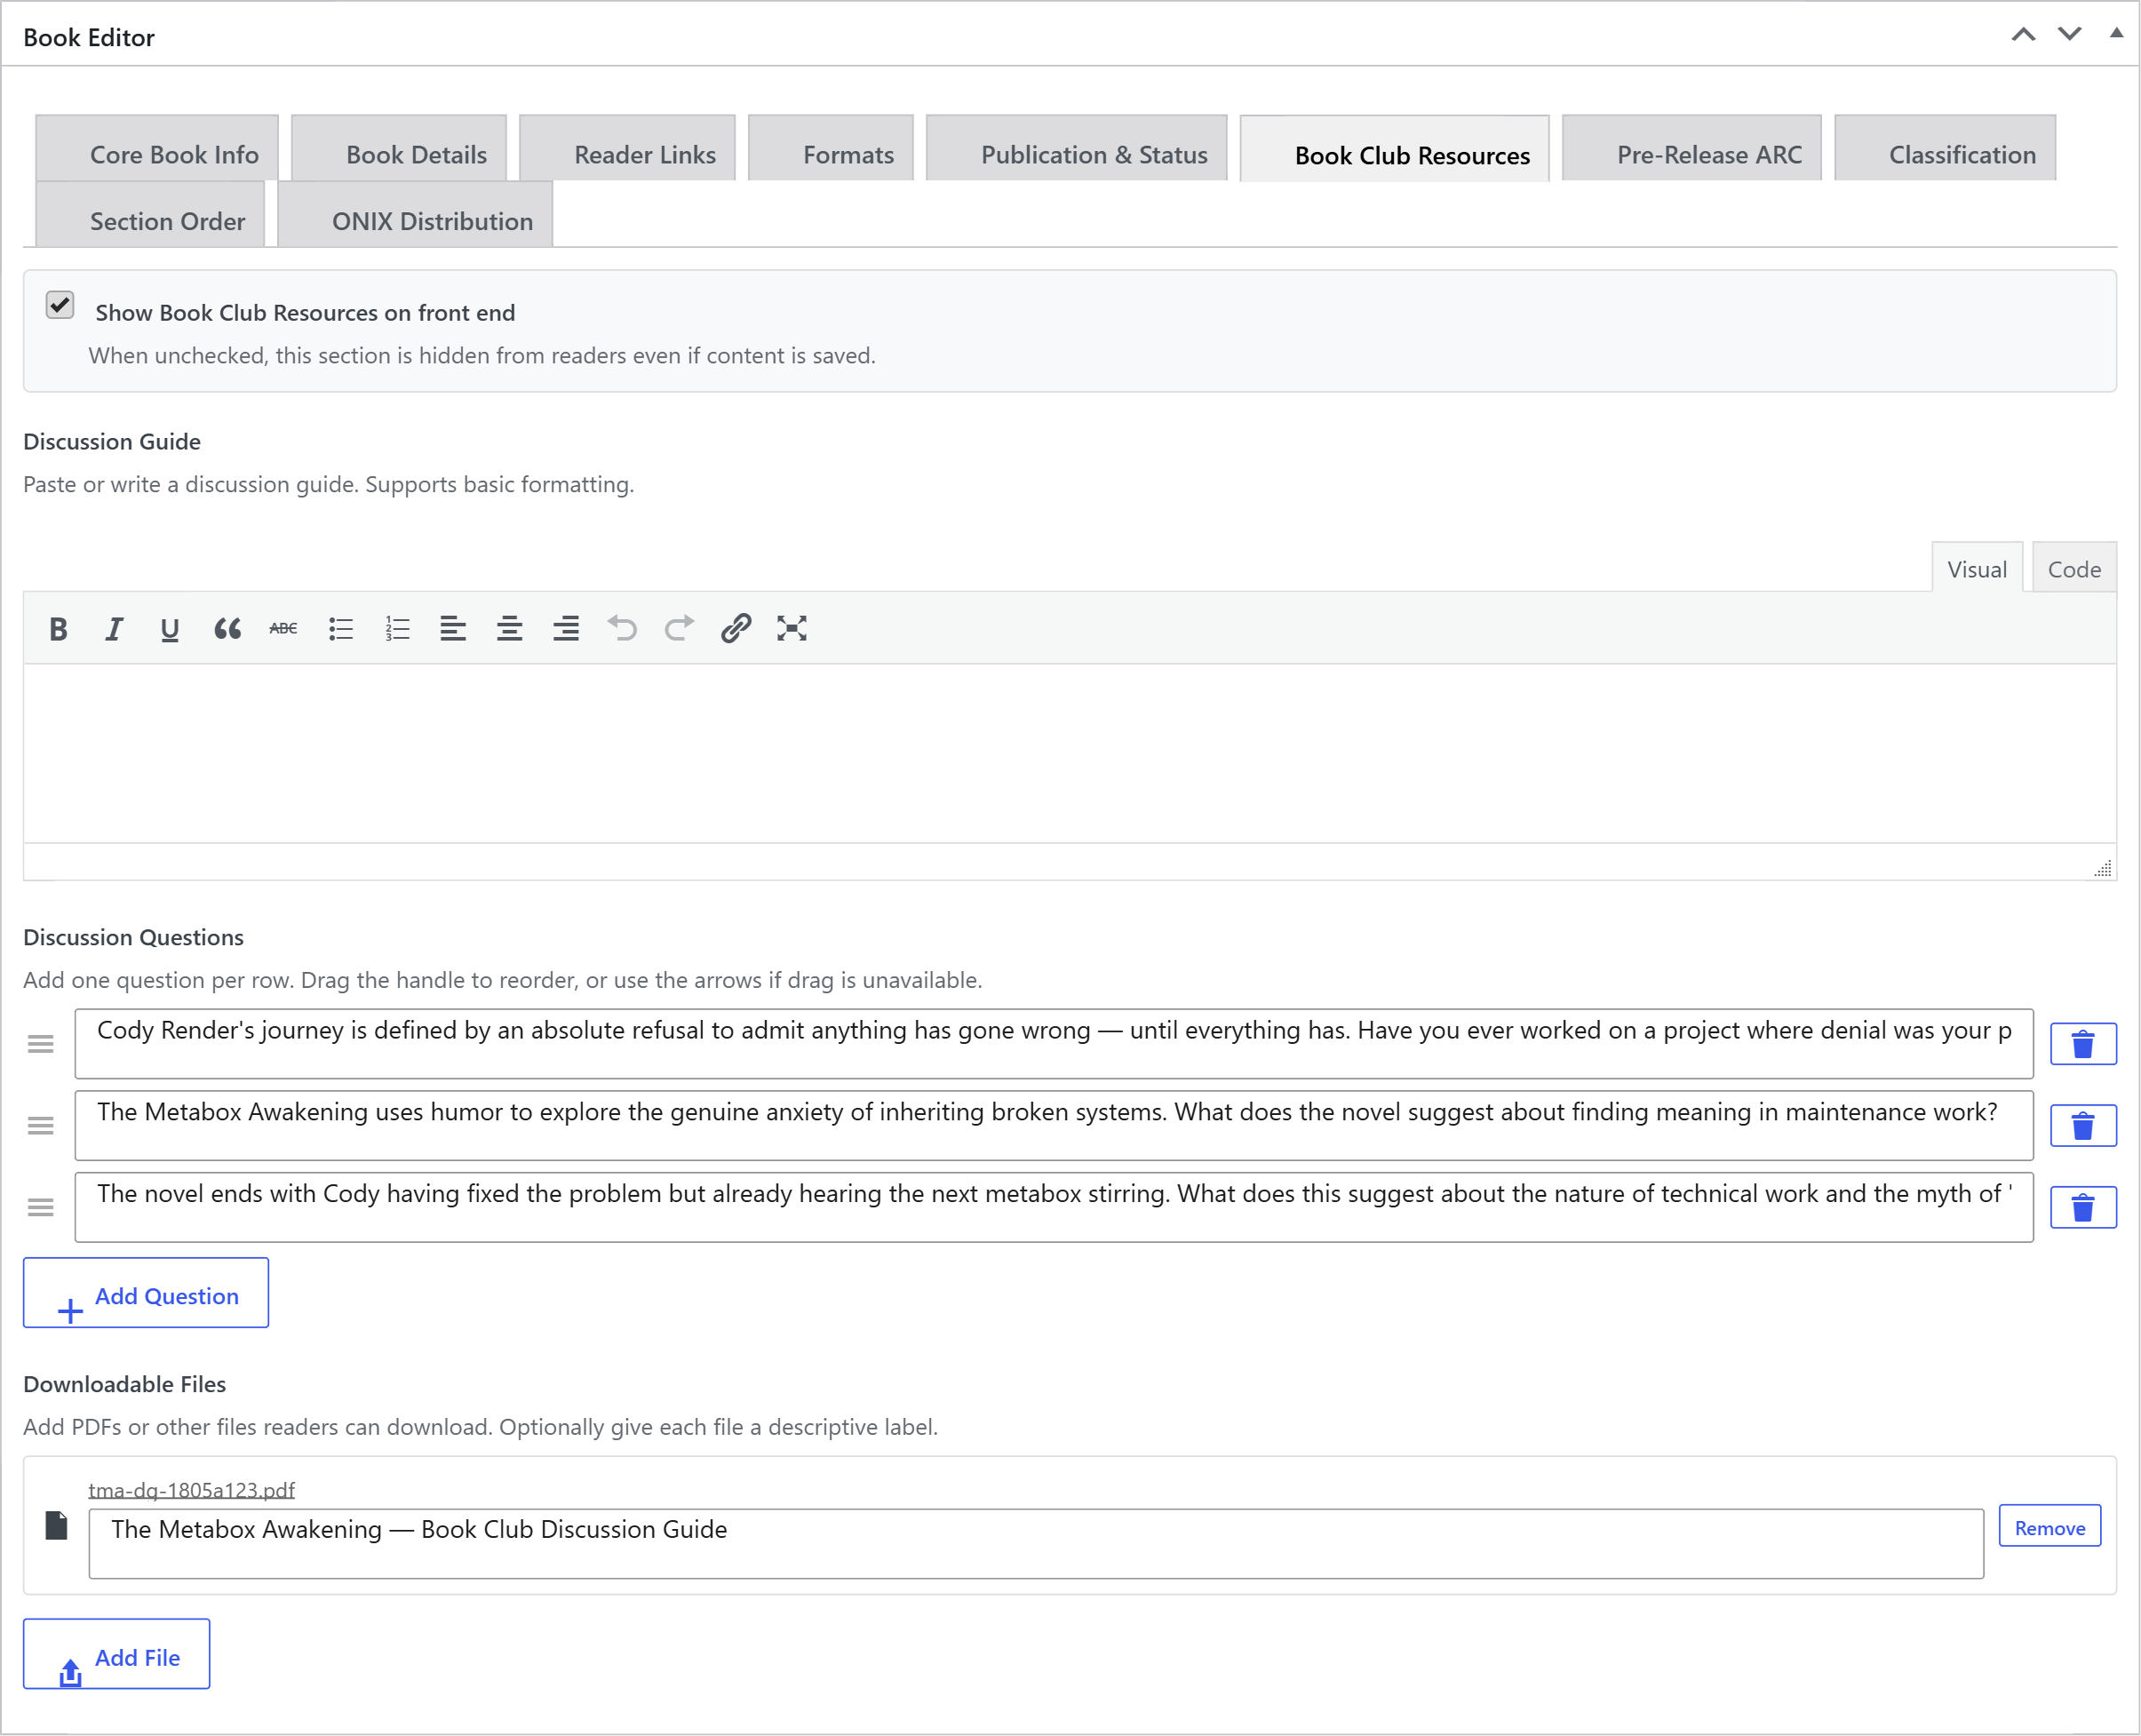
Under Downloadable Files, click Add File to open the WordPress media library and choose a file — a printable discussion guide PDF, a map, a character sheet, or anything else your readers might want.
Each file row has an optional label field. Give the file a friendly name such as Discussion Guide PDF; if you leave the label blank, the original filename is shown instead. Use Remove to drop a file from the list.
Files are stored by their media-library attachment ID, so if you delete the underlying attachment in WordPress the row is skipped automatically and never renders a broken link.
Step 6 — Save and preview
Update the book to save your changes, then view the book on the front end.
When display is enabled and at least one field has content, a Book Club Resources block appears on the page containing, in order:
- the Discussion Guide text,
- a numbered Discussion Questions list, and
- a Downloads list, where each file is a download link (using your label, or
the filename if you left the label blank).
How it renders
Each part of the section only appears if it has content. A book with questions but no guide shows just the questions; a book with only a downloadable PDF shows just the Downloads list. This keeps the section relevant to whatever you have actually prepared, with no empty headings.
Because the visibility toggle and the empty-content check are both enforced when the page builds, you stay in full control of when reading groups see your material — and your readers only ever see a finished, populated section.